ASP.NET Core SignalR is a library from Microsoft, which in particular provides developers with the ability to include real-time features into web applications. Although the first, which naturally comes to mind when you hear ‘real-time’ is a chat, it can be applied to a lot of use cases like games, online polls, real-time dashboards, collaborative applications, and so forth. Here, at Redwerk, we have a great deal of experience with SignalR, and can safely say that it is a really powerful and easy-to-use library.
Let us imagine that you faced a situation when your client has a scheduler dashboard for a big team, how would you provide end-users with up-to-date information without pushing them to refresh the page all the time? Or, for example, if you use Azure Media Services and you need to notify your users that video has been successfully processed? The ‘bad’ way would be to use polling. In point of fact, polling itself is not a bad thing because, by its nature, it is just an implementation of an endpoint call. However, constant polling is a wasteful thing especially when you have to poll some endpoint, which every time gets something from the database. It is wasteful in terms of resources, traffic, your efforts, and no doubt that most of the requests will be not useful. That is where SignalR comes into play.
As it is mentioned in the official documentation, SignalR supports several techniques for handling real-time communications:
- WebSockets: it is the most optimal way since it is the only transport that establishes a true persistent, two-way connection. If both client and server support such a mechanism, it will be used.
- Server-Sent Events is used when WebSockets are not supported. This is a mechanism that allows the server to asynchronously push the data to the client once a pipe from the server to the client is created (by creating an object called an EventSource).
- Long Polling is used, when both WebSockets and Server-Sent Events are not supported. It is based on the Comet web application model, in which the client requests information from the server as in normal polling, but if the server has no new information for the client, instead of sending an empty response, it holds the request open and waits for information to send. Once it does have it, the server completes the request by sending a response to the client. Ordinarily, after this, the client immediately requests information from the server again, so the server almost always has an available waiting request.
Behind the scenes, SignalR automatically chooses the best method that is within the capabilities of the server and client.
In this article, we will use ASP.NET Core SignalR and some people can be confused between it and ASP.NET SignalR, so let us clarify this point. There are two implementations of SignalR:
- ASP.NET SignalR – represented by the NuGet package Microsoft.AspNet.SignalR and runs on applications using the .NET Framework and System.Web;
- ASP.NET Core SignalR is part of the ASP.NET Core platform which runs on both .NET Core and .NET Framework and uses the NuGet package Microsoft.AspNetCore.App. It is not compatible with clients or servers for ASP.NET SignalR.
Overall, ASP.NET Core SignalR maintains a lot of the same core concepts and capabilities as SignalR. Here are the main differences between them:
- Automatic reconnects. They are not supported in ASP.NET Core SignalR. The client application must explicitly start a new connection when it is needed. When ASP.NET SignalR first appears, automatic reconnection seemed to be a good idea, but this proved to be buggy and inefficient. The same is for server unsent message buffering, it is up to the server – to implement it or not.
- Differences on the client. The ASP.NET Core SignalR client is written in TypeScript. You can use JavaScript or TypeScript client library without mandatory referencing jQuery. Also, they changed a way of obtaining: in previous versions, the JavaScript client was obtained through a NuGet package in Visual Studio, but now you can use npm to obtain and install the package.
- Scaleout. They have a little difference now in scaling since Azure SignalR Service started support ASP.NET. Basically, SignalR shipped with built-in support for scale-out using Redis and SQL Server. ASP.NET Core SignalR was redesigned with a more straightforward and more extensible scale-out model: it supports Redis and Azure SignalR Service.
- Protocol support. ASP.NET Core SignalR supports JSON, a new binary protocol based on MessagePack, and also it allows creating custom protocols.
- Dependency injection (DI). ASP.NET Core ships with DI built into the framework. Services can use it to access the HubContext (and we will review this point later on in the article).
In this article, we will review the process of creating a simple chat, even though it is a very ‘classic’ example, it is easy to show the general process of working with SignalR and it is not time-consuming at all. As a frontend framework, we will use Vue.js – an open-source JavaScript framework for building user interfaces. At the moment, ASP.NET Core only supports Angular, React and React with Redux out-of-the-box. In the next paragraph, we will review a little bit of how you can manage this situation and give you an overall picture of what we are going to work with at the practice part.
Since our main goal is to achieve some knowledge on how to work with ASP.NET Core SignalR, we will not review Vue.js in detail. Surely, we will provide some details that will allow readers to get a general understanding of how it all works, but not in an over detailed manner.
ASP.NET Core with Vue.js
The discussion on what would be better to use – ReactJS, Angular, Vue.js, or something else can be a topic worthy of a freestanding article. In this one, we have chosen the Vue.js framework since it is quite simple, but a powerful one with good documentation (which is also an important thing, especially for beginners). Vue became the most popular front-end GitHub project in 2018, at the time of writing it has 148 thousand stars and more than 21 thousand forks on GitHub. Besides, Vue.js has no official template and those who need to use it can be a little bit confused with what to do. All these reasons served as an impetus for choosing Vue.js and for showing some of the available solutions for the readers.
The problem with the lack of template occurred for developers with ASP.NET Core 2.1 version. Previously, SPA templates were available via Microsoft.AspNetCore.SpaTemplates package and had Vue.js support. Since all SPA templates were moved to the core repository, their choice became more limited. The good news is that there are a few ways to solve this problem.
The first variant is to create a separate project for the frontend using the Vue CLI. This is a really common solution and you can find a lot of manuals for it. This variant is also more complicated but has its own advantages, like independent scaling and the ability to use suitable hosting options for each other.
The second approach is to replace React with Vue.js in the React SPA template manually. In fact, this is precisely how some open source templates were created, so you can now understand their basis and nature.
For the sake of brevity, we will not stop all these solutions. Instead, we will cease on the last listed here solution: using the already created templates (which we mentioned earlier above). There are quite a few open-source templates, which you can use. We chose the pretty popular one from TrilonIO. In fact, you can try any other template and decide which suits you best. Our choice was due to the fact that we have a good experience using this template within one of our projects.
Now, when you have a vision on what SignalR is suitable for, what requirements we need for our demo and what led us to such choices, we can start reviewing the whole process in a targeted manner.
Getting Started With Vue.js and ASP.NET Core SignalR
Setting up the project
In this paragraph, we review the process of creating a simple chat in details, so those who are already familiar with it in some way can skip the explanation and just review the way of working with SignalR. However, for beginners, it must be useful and interesting to see the process from scratch. We review a variant of creating a new solution together with the project by using Windows PowerShell. You should have installed Node.js and .NET Core, and of course have some IDE.
So, let us start. Open the console, navigate to your folder and run the following command:
$ dotnet new sln -n RealTimeApp
With command `dotnet new` you can create a new project, configuration file, or solution based on the specified template with all required dependencies. Here, we indicate that we want to create a solution (by an option `sln`) with the name `RealTimeApp` (by option `-n RealTimeApp`). If you do not specify the name, it will automatically correspond to the name of the folder. After running this command, you should see a newly created solution in your folder. Related to the project standard structure, create a new folder near the solution with the next command:
$ md RealTimeAppCore
We use TrilonIO template further, which should be manually installed by running the following command inside the created folder:
$ dotnet new --install "aspnetcore-vuejs"
As a result, you should see a list of all available templates and should be able to create a new project with any of them. The template we need must have a name vuejs, and with the command below we can create a new project using:
$ dotnet new vuejs
The project name is the same as the folder name, which is suitable for us. The commands above just create the new project and solution, but they are not connected to each other. To link them together, return to the solution folder and run this command:
$ dotnet sln add .\RealTimeAppCore\RealTimeAppCore.csproj
If you now open the project in the Visual Studio you will see a pretty standard project with a few controllers, views and models, as well as basic example of usage. The template can be fairly interesting for those, who have no experience with Vue.js. We create all from scratch, so let us remove the following unnecessary files:
- …\ClientApp\components\about.vue
- …\ClientApp\components\fetch-data.vue
- …\ClientApp\components\counter-example.vue
- whole folder…\Providers\
- …\Controllers\WeatherController.cs
- …\Models\WeatherForecast.cs
After deleting you may face some errors. To fix them, you just need to clean the StartupClass by removing next lines:
- using RealTimeAppCore.Providers;
- services.AddSingleton<IWeatherProvider, WeatherProviderFake>();
At this point, we have a clean project so we can start setting up a project for our needs. Firstly, we will need a model and controller. Right-click the folder “Models”, select “Add” in the context menu and create a new class “Message”. In our case it must contain just two fields: “Text” and “Date” as it is shown below:
using System;

  namespace RealTimeAppCore.Models {
      public class Message {
          public string Text { get; set; }

          public DateTime Date { get; set; }
      }
  }
The structure is simple enough, that is why we have no need to review it. The controller will be a little bit more complicated. The same as for the models, right-click the folder “Controllers”, select “Add” in the context menu and create a new class “MessagesController”. Here is the content of this file, which we review below:
using Microsoft.AspNetCore.Mvc;
  using RealTimeAppCore.Models;
  using System.Collections.Generic;

  namespace RealTimeAppCore.Controllers {
      [Route("api/[controller]")]
      public class MessagesController : Controller {
          [HttpGet("[action]")]
          public IActionResult GetMessages() {
              List messages = new List();

              var result = new {
                  messages
              };

              return Ok(result);
          }
      }
  }
With `[Route(“api/[controller]”)]` attribute we set that all methods inside this controller can be executed for the path `[host]/api/[controller name]/[method name]`. Beginners must keep in mind that controller name means the part of name without word ‘Controller’, so for the method `GetMessages` URL is `[host]/api/Messages/GetMessages`. At this point we have only one method, which returns an empty list of messages.
To finish setup our project, we also have to make some changes in the frontend files. First, let us clean up our routes by replacing the content of the `ClientApp\router\routes.js` file with the following lines:
import HomePage from 'components/home-page'

  export const routes = [
      { name: 'home', path: '/', component: HomePage, display: 'Home', icon: 'home' }
  ]
We need just simple routing, so the cleaned routing (since we deleted other views) from the example suits us. Secondly, we need to update our home page. At this step, we just remove all unnecessary data and add a simple loader, title, and method for getting the data. Replace the content of the `ClientApp\components\home-page.vue` file with the following lines:
<template>
      <div>
          <h1>Simple chat</h1>

          <div v-if="!messages" class="text-center">
              <p><em>Loading...</em></p>
              <h1><em>Message:</em>'{{ message.text }}'</p>
              </div>
          </template>
      </div>
  </template>

  <script>
      export default {
          data() {
              return {
                  messages: null
              }
          },

          methods: {
              async loadMessages() {
                  try {
                      let response = await this.$http.get(`/api/messages/getMessages`)
                      this.messages = response.data.messages
                  } catch (err) {
                      console.log(err)
                  }
              }
        },

        async created() {
            this.loadMessages()
        }
      }
  </script>

  <style>
  </style>
For those who are not familiar with the Vue.js, let us review a little bit the content of this file. When a Vue instance is created, it adds all the properties found in its data object to Vue’s reactivity system. In our example, we just set that we have an empty object “messages”, which will be updated in the `loadMessages` method.
Each Vue instance on creation goes through a series of initialization steps and runs so-called “lifecycle hooks” functions. With the help of such hooks, you can add your own code to perform on specific stages. In our example, we used the “created” hook for setting the message object with the data from the controller after the Vue instance was created.
In fact, those of the readers, who just want to know how to set up an ASP.NET Core project with Vue.js must have a basic template now.
Configure SignalR
It is now time to get acquainted with the key point of the article – SignalR. You do not need any additional installations since it is a part of the Microsoft.AspNetCore.App meta-package, which must be installed automatically.
To enable SignalR you simply need to update your Startup class as follows:
- add using `Microsoft.AspNetCore.SignalR;` namespace on the top of the file;
- update the ConfigureServices method by adding services.AddSignalR call, which configures services required by SignalR middleware:
public void ConfigureServices(IServiceCollection services) { services.AddSignalR(); // Add framework services. services.AddMvc().SetCompatibilityVersion(CompatibilityVersion.Version_2_2); } - setup SignalR routes by calling app.UseSignalR in the Startup.Configure method:
public void Configure(IApplicationBuilder app, IHostingEnvironment env) {
      if (env.IsDevelopment()) {
          app.UseDeveloperExceptionPage();

          // Webpack initialization with hot-reload.
          app.UseWebpackDevMiddleware(new WebpackDevMiddlewareOptions {
              HotModuleReplacement = true,
          });
      } else {
          app.UseExceptionHandler("/Home/E
          // The default HSTS value is 30 days. You may want to change this for production scenarios, see https://aka.ms/aspnetcore-hsts.
          app.UseHsts();
      }

      app.UseHttpsRedirection();
      app.UseStaticFiles();

      app.UseSignalR(route => {
          route.MapHub("/signalr-hub");
      });

      app.UseMvc(routes => {
          routes.MapRoute(
          name: "default",
          template: "{controller=Home}/{action=Index}/{id?}");

          routes.MapSpaFallbackRoute(
          name: "spa-fallback",
          defaults: new { controller = "Home", action = "Index" });
      });
  }
With a line `route.MapHub(“/signalr-hub”)`, we set up `SignalRHub` class as a request handler for the path “signalr-hub”, so clients should be able to connect with the hub at `[host]/signalr-hub`
Get started with SignalR Hubs
Using hubs, ASP.NET Core SignalR makes possible two-way communication between the server and client. As described in the official documentation, hubs call client-side code by sending messages that contain the name and parameters of the client-side method. The client tries to match the name to a method in the client-side code. When a match is found, it calls the method and passes the deserialized parameter data to it.
Hub creation is a very simple process. Create a new folder named “Hubs” inside the project and add a new `SignalRHub.cs` file. Our new class should be inherited from the base Hub class:
using Microsoft.AspNetCore.SignalR;

  namespace ResPlanner.Hubs {
      public class SignalRHub : Hub {
      }
  }
You can also add public methods inside this class, which can be called by clients. SignalR handles the serialization and deserialization in parameters and returns values, so you can specify them like in any C# method.
We also use the SignalR JavaScript client library to manage the establishment of the connection to our Hub and for managing events. It is delivered as an npm package, so you can easily install it by running this command:
$ npm install --save-dev @aspnet/signalr
Now, we are ready for the final step of the guide: let us create a new method in the controller, which will receive a new message, send an event to all clients, and prepare our client to receive this event.
Since we need to send an event not from the Hub itself, but from the controller, we have to inject an `IHubContext` into the controller by adding it to the constructor, as you can see in the listing below. We also add a new method, which receives a model created before and sends an event to all connected clients, using `Clients.All`. Here is how your controller must look now:
 using Microsoft.AspNetCore.Mvc;
  using Microsoft.AspNetCore.SignalR;
  using RealTimeAppCore.Models;
  using ResPlanner.Hubs;
  using System;
  using System.Collections.Generic;
  using System.Threading.Tasks;

  namespace RealTimeAppCore.Controllers {
      [Route("api/[controller]")]
      public class MessagesController : Controller {
          ///
          /// The context
          ///

          private readonly IHubContext _hubContext;
          public MessagesController(IHubContext hubContext) {
              _hubContext = hubContext;
          }

          [HttpGet("[action]")]
          public IActionResult GetMessages() {
              List messages = new List();

              var result = new {
                  messages
              };

              return Ok(result);
          }
          [HttpPost("[action]")]
          public async Task SendMessage([FromBody]Message message) {
              await _hubContext.Clients.All.SendAsync("RefreshEvent", Json(new {
                  text = message.Text,
                  date = DateTime.Now.ToString("MM/dd/yyyy HH:mm:ss")
              }));
          }
      }
  }
Basically, these are all changes for the server side. To connect and listen to the server events, on the client side we should do the following:
- inside the `initSignalR()` method:
- create new connection to the Hub with the following lines:
this.connection = new HubConnectionBuilder() .withUrl(window.location.origin + '/signalr-hub') .configureLogging(LogLevel.Information) .build(); … this.connectToSignalR(); - configure reconnection after 5 seconds, if the Hub connection is closed:
this.connection.onclose(() => { this.connectToSignalR(); }) - start listening to the `RefreshEvent` event from the server. Once it is received, our list of messages should be updated with new data:
this.connection.on('RefreshEvent', (data) => {
      this.messages.push({ text: data.value.text, date: data.value.date })
      this.$store.getters.needReloadPage
  })
- create new connection to the Hub with the following lines:
- add `connectToSignalR` method, in which we actually establish a connection:
connectToSignalR() {
      this.connection.start().catch(err => {
          console.error('Failed to connect with hub', err)
          return new Promise((resolve, reject) =>
          setTimeout(() => this.connectToSignalR().then(resolve).catch(reject), 5000))
      })
  }
Also, we should add a new method to send a message to the server. First, we add some form for the user input after the template with an input field and a button, like this:
<section class="form">
      <div class="field">
          <div class="control">
              <input v-model="form.textMessage" class="message-input" type="text" placeholder="Type a message here">
              <button class="dark-bg text-white submit-button" @click.prevent="sendMessage">Submit</button>
          </div>
      </div>
  </section>
Then we bind form input element value to the Vue instance data using the v-model directive, so the data should look like this:
data() {
      return {
          messages: [],
          form: {
              textMessage: ''
          }
      }
  },
Finally, we add the `sendMessage()` method, which should be called after the user clicks on the button and which should call the `SendMessage` method from the controller. So, after all these changes, your ‘home-page.vue’ file should contain the following:
<template>
      <div>
          <h1>Simple chat</h1>

         <div v-if="!messages" class="text-center">
              <p>Loading...</p>
              <h1><icon icon="spinner" pulse /></h>
          </div>

          <template v-if="messages">
              <div v-for="(message, index) in messages" :key="index">
                  <p> <em>Message at {{ message.date }}: </em> '{{ message.text }}'</p>
              </div>
          </template>
         <section class="form">
              <div class="field">
                  <div class="control">
                      <input v-model="form.textMessage" class="message-input" type="text" placeholder="Type a message here">
                      <button class="dark-bg text-white submit-button" @click.prevent="sendMessage"gt;Submit</button>
                  </div>
              </div>
          </section>
      </div>
  </template>

  <script>
      import { HubConnectionBuilder, LogLevel } from '@aspnet/signalr'
      export default {
          data() {
              return {
                  messages: [],
                  form: {
                      textMessage: ''
                  }
              }
          },

          methods: {
              async loadMessages() {
                  try {
                      let response = await this.$http.get(`/api/messages/getMessages`)
                      console.log(response.data.messages)
                      this.messages = response.data.messages
                  } catch (err) {
                      window.alert(err)
                      console.log(err)
                  }
              },
              initSignalR() {
                  this.connection = new HubConnectionBuilder()
                  .withUrl(window.location.origin + '/signalr-hub')
                  .configureLogging(LogLevel.Information)
                  .build();
                  this.connection.onclose(() => {
                      this.connectToSignalR();
                  })
                  this.connectToSignalR();
                  this.connection.on('RefreshEvent', (data) => {
                      this.messages.push({ text: data.value.text, date: data.value.date })
                      this.$store.getters.needReloadPage
                  })
              },
              connectToSignalR() {
                  this.connection.start().catch(err => {
                      console.error('Failed to connect with hub', err)
                      return new Promise((resolve, reject) =>
                      setTimeout(() => this.connectToSignalR().then(resolve).catch(reject), 5000))
                  })
              },
              closeConnectionSR() {
                  if (!this.connection) return;
                  this.connection.off('RefreshEvent');
                  this.connection = null;
              },
              sendMessage() {
                  this.$http.post('api/Messages/SendMessage', {
                      text: this.form.textMessage
                  })
                  .then(request => {
                      console.log(request)
                      if (request.status = 200) {
                          this.form.textMessage = '';
                      }
                  });
              }
          },

          async created() {
              this.initSignalR()
          }
      }
  </script>

  <style>
      .submit-button {
          padding: .5rem .75rem;
          margin-left: 10px;
          border: 1px solid #dee2e6;
          border-radius: 10px;
          width: 150px;
      }
      .message-input {
          padding: .5rem .75rem;
          color: #007bff;
          border: 1px solid #dee2e6;
          border-radius: 10px;
          width: 700px;
          height: 50px;
      }
  </style>
Now you can start testing our demo chat! Try opening two different browser windows and start chatting – you will see that all available clients will show the refreshed data:
Conclusion
In this article, we tried to cover all general aspects of how to start work with ASP.NET Core, Vue.js, and SignalR. Here you can also find some details on what SignalR is, what benefits it provides, short comparison of ASP.NET SignalR and ASP.NET Core SignalR, and so forth. We hope that this article dispelled some fears of beginners, and showed another way to work with these technologies for more experienced developers. So, we believe everyone should be able to find something interesting and new here.
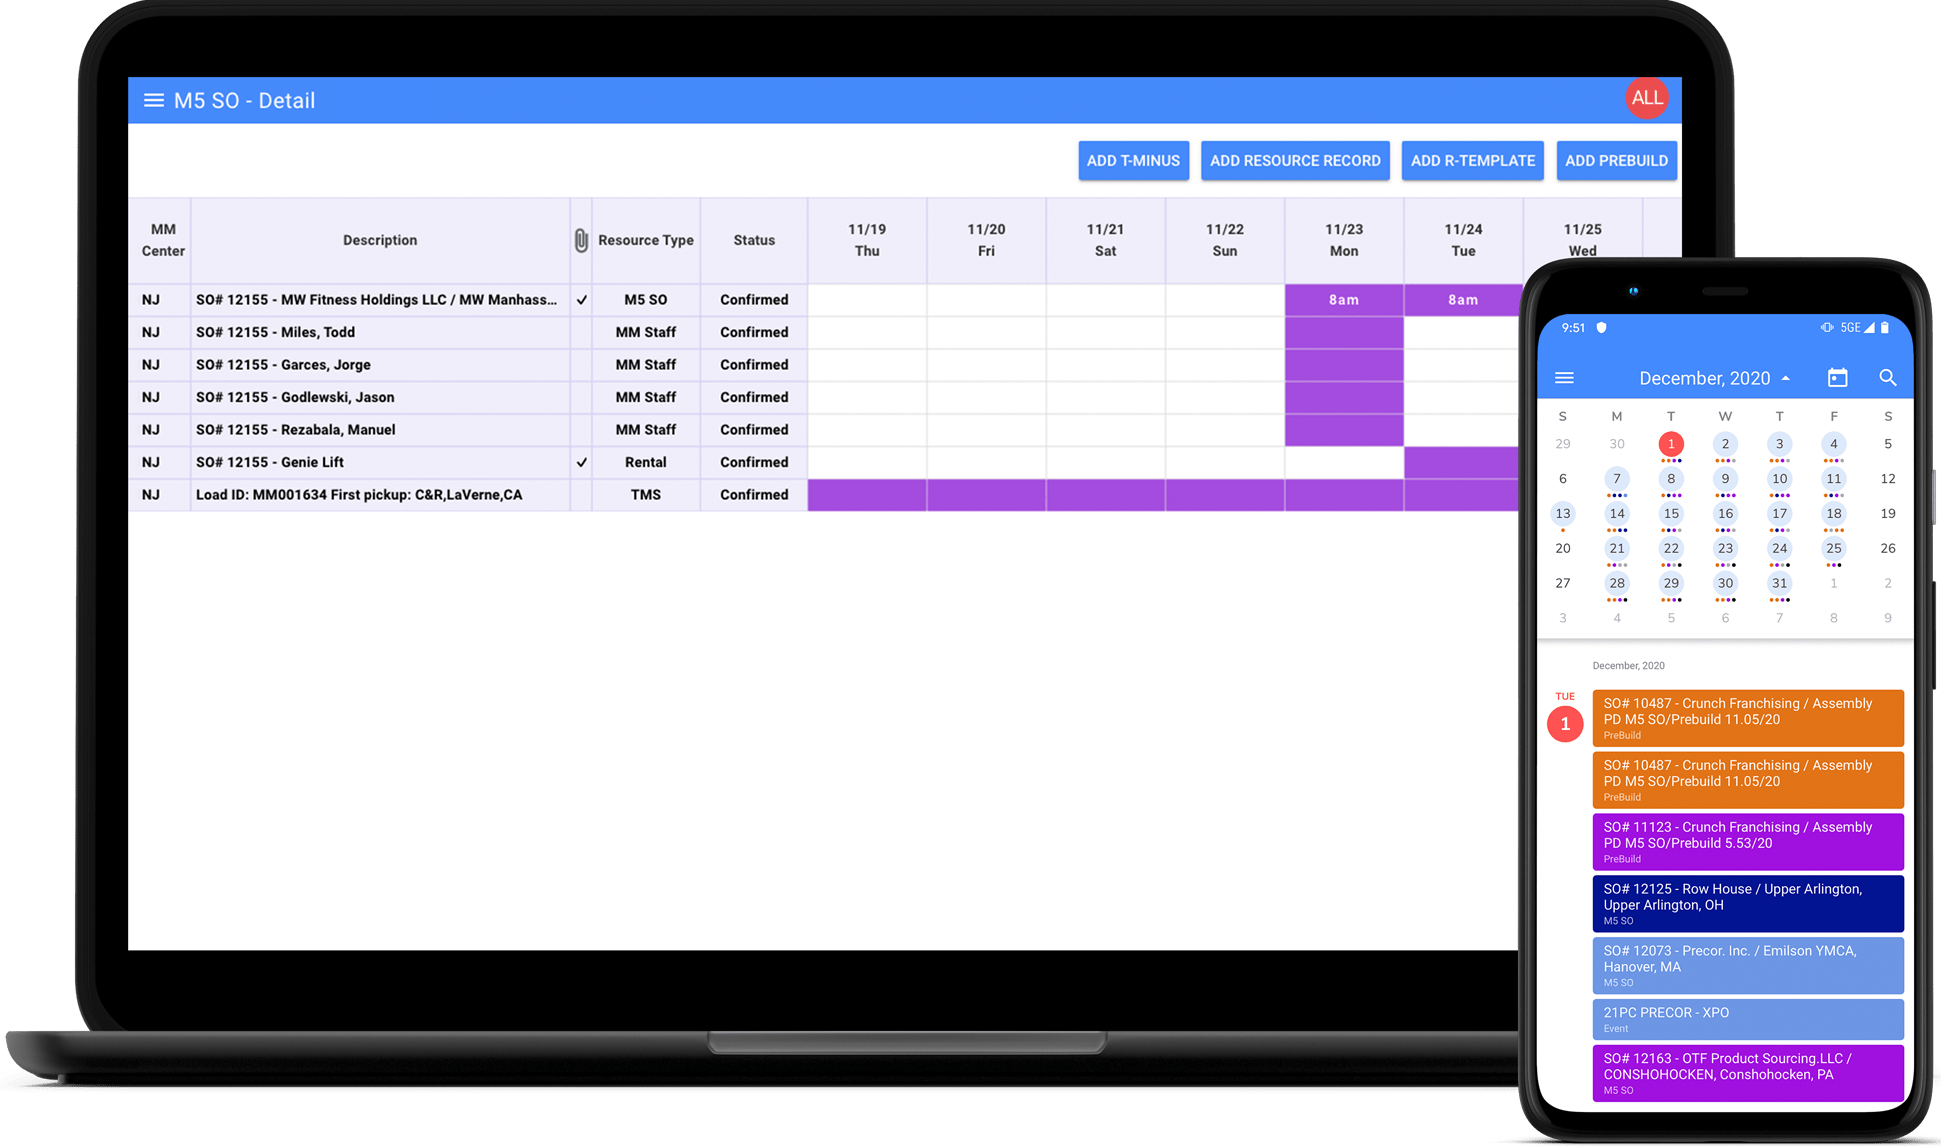
See how we developed a solution for clear-cut fitness logistics using ASP.NET core